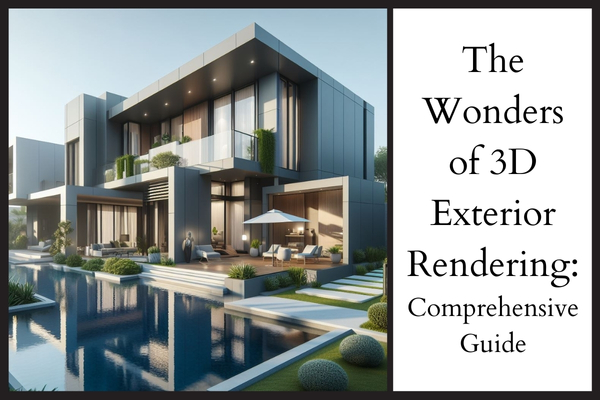
When it comes to architectural visualization, 3D exterior photomontages are game-changers. They breathe life into architectural designs, allowing stakeholders and clients to envision projects realistically and tangibly. This comprehensive guide will explore the ins and outs of creating jaw-dropping 3D exterior photomontages, ensuring your architectural projects stand out from the crowd.
The Art of 3D Exterior Photomontages
1. Understanding Photomontages
Photomontages are a powerful tool for architects, designers, and developers. They allow you to merge your architectural designs with real-life settings, providing a visually compelling representation of your vision. The key to a convincing photomontage is seamlessly integrating your 3D model into the existing environment. This involves understanding how light interacts with objects, how shadows fall, and how the materials in your design relate to the surroundings.
2. Choosing the Right Software
Selecting the appropriate software is vital to your photomontage journey. Industry-standard programs like Autodesk 3ds Max, SketchUp, and V-Ray offer a wide range of tools and features to help you create realistic 3D models. Familiarizing yourself with these software options is essential, as it allows you to harness their capabilities to their fullest potential.
Preparing Your 3D Model
3. Model Accuracy
Precision is paramount when it comes to creating photomontages. Your 3D model should accurately reflect the architectural design, including dimensions, proportions, and fine details. Inaccuracy in your model can lead to misalignment with the photograph, diminishing the overall realism of your photomontage.
4. High-Quality Textures
Textures are the visual and tactile aspects of materials, and they play a crucial role in making your 3D model look lifelike. Investing in high-quality textures for materials such as wood, concrete, glass, and metal can significantly enhance the realism of your photomontage. Quality textures ensure that your surfaces reflect light and shadow realistically.
5. Lighting and Shadows
Realistic lighting and shadows are at the heart of creating a compelling photomontage. Your 3D model should be designed to replicate real-world lighting conditions. This means understanding the angle, direction, and intensity of light sources in your photograph and ensuring that your model reacts to these sources authentically. Accurate shadow placement is critical in achieving a seamless blend between the 3D model and the photograph.
The Photographic Element
6. High-Resolution Photographs
The foundation of a jaw-dropping 3D exterior photomontage is high-quality source photographs. These images should capture the site in all its glory, with ample detail and resolution. Sharp, clear, and high-resolution photographs serve as the canvas onto which you will layer your 3D model, ensuring your final composition is as realistic as possible.
7. Correct Angles and Perspectives
Aligning the angles and perspectives in your photographs with those in your 3D model is critical. It’s essential to ensure that the vantage point from which the photograph was taken matches the camera angle used in your 3D model. This alignment prevents perspective distortions and contributes to a more convincing photomontage.
8. Matching Lighting
Consistency in lighting is the linchpin of a believable photomontage. Your 3D model should respond to the same lighting conditions in your source photograph. Ensure that the direction, intensity, and color temperature of the light in your 3D scene mirrors those in the photograph. This alignment guarantees that your 3D elements seamlessly merge with the real-world environment.
The Photomontage Process
9. Layering and Blending
Once your 3D model and high-resolution photograph are ready, it’s time to dive into the photomontage process. This often involves using software like Adobe Photoshop to layer and blend the two elements. During this stage, you carefully integrate the 3D model into the photograph, considering factors like perspective, scale, and lighting. The goal is to create a harmonious composition where your design naturally exists within the environment.
10. Fine-Tuning
In the final stages of the photomontage process, attention to detail is paramount. Adjust colors, contrast, and sharpness to integrate the 3D model with the photograph seamlessly. This fine-tuning ensures that your photomontage appears as one cohesive image, with no visual discrepancies between the two components.
Conclusion
In conclusion, creating jaw-dropping 3D exterior photomontages requires technical expertise, creativity, and attention to detail. By mastering the art of photomontages, you can effectively communicate your architectural vision to clients and stakeholders, fostering a deeper understanding of your projects. The key to a successful photomontage lies in the accuracy and quality of your 3D model, the photographic elements you use, and the meticulous blending of these elements. Dedication, practice, and a commitment to delivering photorealistic representations will set your architectural designs apart and leave a lasting impression on those who view them.